
|
Christophs Tape pages - Revox B77 PC Remote Control - |
|
Digital/Analog - DIY Project
|
|
I always receive many recorded tapes whose recordings I consider worth keeping, e.g., with music I don't know yet.
Sometimes other people who still have tapes but no tape recorder anymore get in touch with me.
Noisy microphone recordings of a family celebration from 40 years ago are sure to hold some nostalgic value for the protagonist (or his heirs).
I then digitize such recordings using one of my tape recorders, whereby the choice of device depends on the track position, speed, etc. of the tape. The B77 is often used for this purpose. Unfortunately, my B77 and the PC I mainly use are several meters apart. It is a bit annoying to constantly switch between the PC and the B77 to rewind the tape a bit and restart the recording on the PC. There are various remote controls available for the B77 (original from Revox and other manufacturers), but I don't really want another remote control; there are already enough lying around here. I usually can't find the right one when I need it anyway. At some point, I came up with the idea of controlling the B77 remotely via my PC (since I was already sitting in front of it). After some soldering and programming work, here is the result. |
|
The Hardware
|
||||
 |
 |
|||
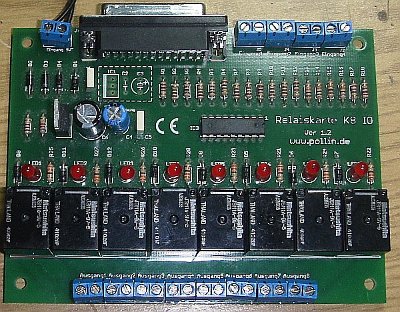
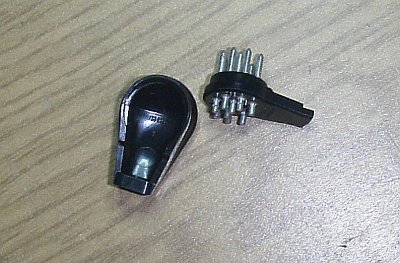
| The link between the PC and the B77. A standard relay card that is controlled via the PC's parallel port. This one has 8 channels that switch 8 relays (the small black squares). The status is indicated by the 8 light-emitting diodes. However, only 6 of the 8 channels are required for the intended application. | This is the plug (9-pin) that fits into the remote control socket of the B77. Unfortunately, these plugs are no longer manufactured. The prices for the remaining stock are accordingly. | |||
 |
||||
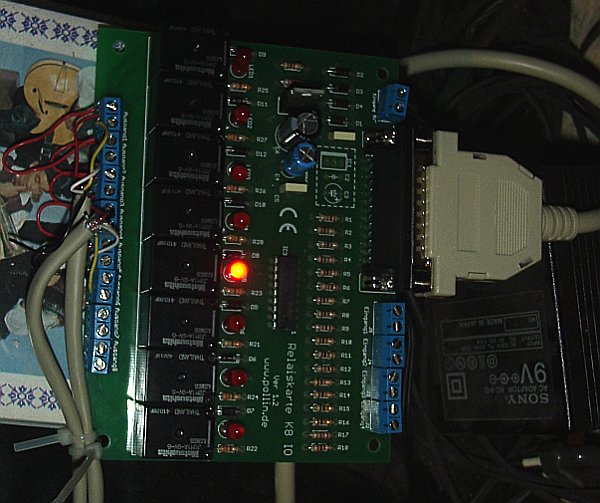
| The whole thing wired up and in the test setup (still without a case). The 25-pin connector to the PC and the two cables leading to the B77 are clearly visible. In the absence of a cable with at least 7 wires, I used two 4-wire cables for the test. | ||||
|
The Software
|
||||
| The graphical part of the program was written in Java.
Unfortunately, however, Java's capabilities are quite limited when it comes to direct access to hardware.
For this application, it is not sufficient to send a data stream to the parallel port; instead, each individual data line must be addressed explicitly.
The data entered, in this case just a few mouse clicks, is then passed on to a small C program with parameters.
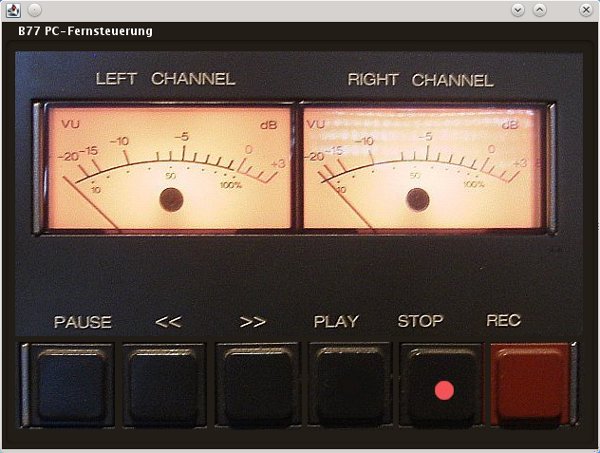
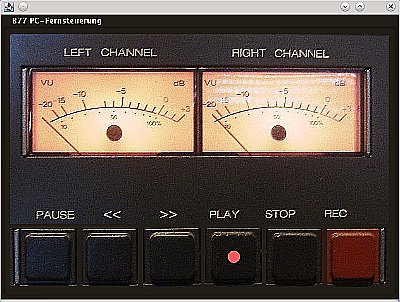
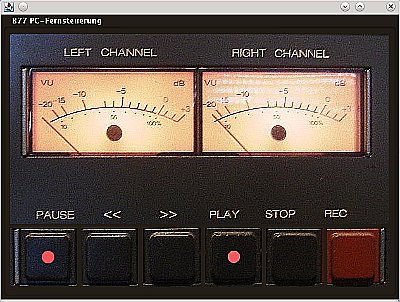
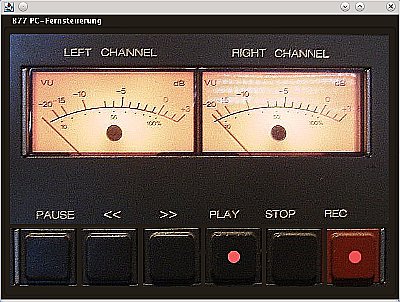
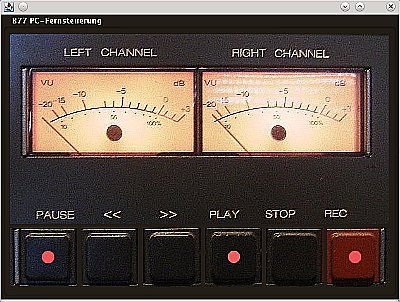
A photograph of the B77 controls was used as the background for the program.
When you click on the buttons, the corresponding function is triggered on the B77.
For a better overview, each key that is pressed in the program is marked with a red dot. Below are a few screenshots of the program. |
||||
 |
 |
|||
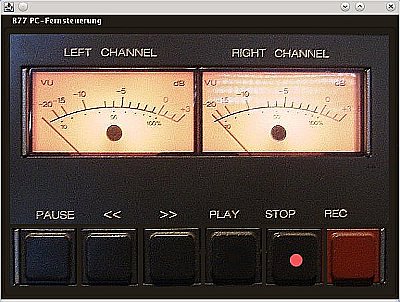
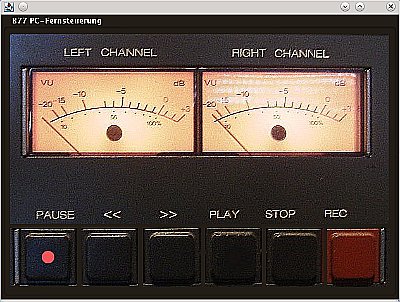
| Stop pressed (clicked). | Pause pressed. The program makes it quite easy to implement the “catching pause button” that is often missing on the B77. Here, the pause button is only unlocked by clicking on it again. | |||
 |
 |
|||
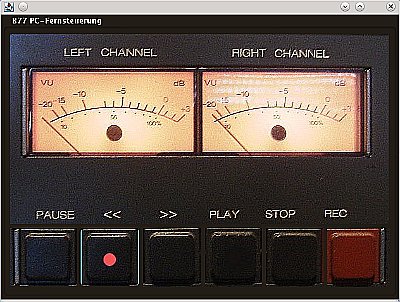
| Fast return
Contrary to the original function on the B77, I decided not to activate the pause function here either, as it simply does not make sense to me. |
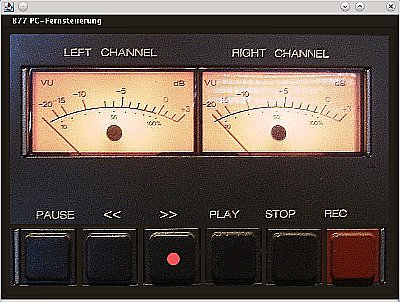
Fast forward Again, no pause feature. |
|||
 |
 |
|||
| Playback | Playback with pause enabled. | |||
 |
 |
|||
| Recording | Recording with pause enabled. | |||
| Addendum in the year 2026 | ||||
| Since there are fewer and fewer PCs with a parallel port, I am looking for an alternative for this control. My last PC with such an interface has just been decommissioned. Now, a special interface card is used in the PC to control the relay card. However, there are also relay cards that have a USB port. Maybe I'll find the time to get one of these cards and modify the program accordingly. | ||||
| ↑ Back to top ↑ | ||||
|
||||